Hot Frugal Holiday Must Haves!

Search This Site

Showing posts with label recycle. Show all posts

Monday, May 3, 2010

Grow Plants in ANY Container @ MIFS

Today at Make It From Scratch showing you how to grow plants in ANYthing! Stop by and join in the conversation.


Experimental upside down bean plant in a 2 liter soda bottle.

Also don't forget about the Wonder Hanger Giveaway ending this week.

Friday, April 9, 2010

What’s a girl to do with ALL THOSE PLASTIC EASTER EGGS???


Plastic Easter eggs are a lifesaver when it comes to buying bulk candy for the kid’s Easter baskets. The eggs are usually about $1 for a dozen. This is how I save a ton of money when making their baskets. Once the day is done, candy has been consumed and the kids are recovering from a sugar coma, we are left with a behemoth pile of plastic eggs.

Sunday, December 6, 2009

How to Make a "Green" Holiday Ornament

FAST Fabric Ornament
One of our many holiday traditions includes getting the kids a new holiday ornament. Every year I either make the ornaments or we buy them one that reflects their personality. Usually it's something like a Scooby or Baby's 1st Christmas ornament.
The last few years, I've taken to making the ornaments but I suppose they reflect more of my crafting style at the time instead of their personality. Oh well, at least I try! I've made ornaments from gold wire, bells, mini glass balls, and other mediums. Some have endured the years. Others haven't faired so well. Anyway, I enjoy making them and the family seems to like them, so it's a win-win situation.
Since I've been learning to sew over the last year, this year's ornaments are...

...Fabric ornaments.


Monday, October 12, 2009

Hand Soap - Semi Homemade Style

Last week I shared this idea with the readers of Make It From Scratch where I contribute every Monday. This week, I thought I'd share it with all my readers who may not have seen it.


We traveled quite a bit last summer for hubby's doctor's visits. We stayed overnight at various hotels because hubby couldn't physically handle the long road trip back home. Thankfully he's better and we're no longer traveling so much but it's left me with a rather large collection of hotel soaps. What to do with them???

Here's a nifty little project you can do with hotel soaps or any bar soap bits you have lying around the house.
  1. Grate soap bits with a cheese grater into a glass dish or double boiler.
  2. Add boiling water and stir till all the soap is melted.
  3. Add optional scented oil.
  4. Allow to cool overnight in a glass dish.
  5. Stir well.
  6. Transfer to soap pump with a spoon and large funnel.
I used one grated hotel soap bar and a half pint of boiling water. If the consistency is too thick for your needs, place the glass dish back in a pot of boiling water to re-melt the soap. Mix more boiling water, allow to cool, and stir when cooled.

It literally takes less than ten minutes and the kids can be great help with this project!

It's that simple to have your own hand soap, semi homemade!


DIY Day @ ASPTL

Wednesday, May 27, 2009

Homemade Cane Fishing Pole

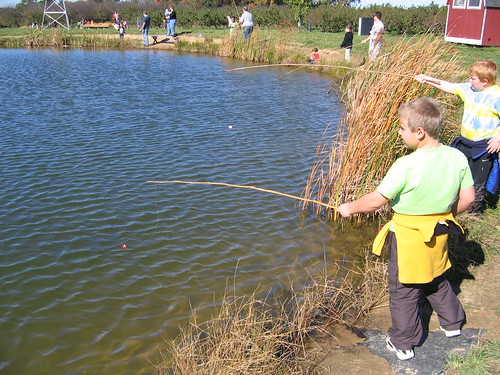
The other day, I gave you a few family friendly fishing tips since our holiday plan was to take the kids fishing. Today, I'd like to share my favorite fishing method as well as how to make a fishing pole of your very own.

I love to fish as much, if not more than, my husband but fishing gear can get quite expensive. In an effort to keep more money in my pocket than in my fishing gear, I prefer to fish with a homemade cane fishing pole. I've had more luck with a cane pole than my husband has with his store bought fishing pole. I've caught catfish, blue gill, crappie, and many other fish off a cane pole.

Cane fishing poles are very easy to make requiring a few minutes of assembly along with a few supplies you probably have in your tackle box.


How to make a cane fishing pole.
  1. Find a long straight stick (NOT a thin switch) at least five feet long that bends slightly when pulled at one end. You want a little give but not too much or you will never get your fish to the shore. A stick too dry will break when you try to bring a fish in while a stick too long or short may be difficult to handle when pulling your fish to the bank. Trial and error is the best way to find the right length and diameter. You might prefer a long fishing pole but I prefer the handling of one a little shorter than my height. I suggest you start with a length around your height making adjustments until you find something you are comfortable with.
  2. Cut some fishing line at least one plus a half the length of your pole. If in doubt cut it double the length or longer. Length of the needed fishing line depends on where you're fishing (dock, bank, around logs, etc) but I air on the side of caution by cutting my line longer.
  3. Wrap your fishing line a few inches from end of the stick several times and tie it off pulling hard to make sure the knot is secure.
  4. Tie a hook to the other end of your line, add any weights, bobbers, lures, etc.
  5. Add your bait then toss in your line.
If your line is to long then wrap the line around the end of the stick a few times till you acquire the length that's manageable for you.

This is VERY user friendly fishing gear even the kids can craft. My kids prefer fishing with a cane pole and find it easier to catch fish. I use smaller sticks and shorter line for their poles. With a cane fishing pole, they don't have to figure out how to time the casting and the line always goes where they want it! When they get a bite, all they have to do is snatch the pole up and their fish is caught.

Storage is simple. When you are done fishing, either wrap the line around the pole securing the hook to the pole or remove the fishing line, toss the stick in the woods or the water, and place the line back in your tackle box for next trip. NEVER toss used fishing line in the water-other fish can get tangled, it can snag on a boater's engine propellers, or further endanger other wildlife. Be smart when you fish and leave the area like you find it to preserve it for the next person.


Here are some great fishing resources to get your fishing trip started!
Tying a Clinch Knot -the knot I use to attach my hook to my line plus they have other great knots you can use too.
Here's a more professional method of creating a cane pole.
Learn about your states fishing license regulations, marina locations, family hot spots, fishing reports, and MUCH more information here.

Thursday, May 14, 2009

Easy Makeover Idea

With a few swipes of sandpaper, a little paint and some hardware, you can take virtually anything from the junkyard to the treasure chest. And it's not as difficult as you might expect.

In five easy steps you can go from THIS...

...an old abused dresser we found in the basement when we moved into the place.


to THIS...

...a beautiful contemporary dresser for my daughter's tweenie room.

  1. Make sure you are in a well ventilated area and have the proper safety gear. ALWAYS follow the manufacturer's directions for proper use and safety requirements!!!
  2. Remove any exterior hardware, handles, etc and sand your surface smooth. If there's several layers of paint, then you may want to consider purchasing a chemical paint remover. Simply follow the manufacturer's directions for proper usage!
  3. Wipe away dust and debris with a damp cloth.
  4. Apply paint. Allow each coat to properly dry before applying the next. Tips: Spray paint is THE BEST, easiest, and quickest painting method! If you are going from a darker color to a lighter color then you'll benefit from using a primer first. This will help reduce the number of top coats required for a beautiful finish. If you want a SUPER SMOOTH surface, lightly sand in between each coat and don't forget to wipe with a damp cloth. Add a clear top coat to heavily used items to extend the life of your painted piece.
  5. Add or replace the hardware and admire your work!

See, it's wasn't THAT hard! The process is similar to getting a manicure. The nail technician removes the old polish, files your nails and pushes back your cuticles to create an even surface. Then she applies multiple coats of polish, and finishes it off with a clear top coat! If you paint your own nails then surely you can paint something. Anything. EVERYTHING!

If you're afraid or don't like bold colors, then go with neutral paint colors: whites, grays, blacks, almond, charcoal, etc. You can punch it up with bold colorful hardware plus you can change the look by switching the hardware in less time it takes for your nails to dry!

It's your turn! What in item would you like to makeover? Light fixtures, chairs, tables, lamps, shelving, planting pots, frames, switch plates??? Inquiring minds want to know!


Wednesday, January 21, 2009

Easy Room Decor Ideas-Girly Edition

004Here's a few things I've done in my daughter's room inexpensively and without too much time involved. Michaela's room was already painted pink when we moved into the house last April so that part was done.  I converted curtains I made for the home we live in before into the canopy you see in the photo. A white full sized sheet, cut in half, stitched hem, then dyed with one bottle of purple RIT per bottle instructions. Two six inch long pieces of ribbon were sewn at one end 005evenly spaced apart and then tied in a square knot to form a loop. The hoop is an old embroidery hoop spray painted hot pink and hung from the ceiling using eye hooks and S hooks. The white bed side drawers needed a little punching up so I added painted wooden knobs!   The cork board in the second picture was salvaged from a thrift store for $1. Tape off and paint the frame hot pink, the cork gray, paint the butterfly and flower using a homemade stencil and your done! 006 The shelf was an old book case with the cardboard backing removed, shelves screwed into place, and again tape it off and paint. I do recommend sanding the veneer so the paint doesn't peel! Her dresser was painted to match using the handle hardware I bought years ago for the bedside table pictured above but discovered was the wrong size after I got it home! These photos were taken last summer and everything still looks great!

Some other easy decorating ideas: String old Christmas lights around the doorway, ceiling, behind a room partition or curtains for a cool effect. Use calendar photos or magazine pictures in painted picture frames to keep up with the ever changing pop star idols. Hot glue ribbon, jewels, etc around frames, dressers, book cases, etc to jazz it up. Create a window valance using old jeans cut into 2" wide strips looped around a curtain rod (plain or fancy) and tied like a necktie. Trim it with sequins, hem it or fray it for the look that matches your child's personality. Decorating a girls room is much easier for me than it is for my boys. Their's is a continual work in progress and will be posted next! What are your decorating ideas?

Monday, January 12, 2009

Custom Stenciled Shirts

There's no need to buy a new clothes when you can update any fabric with an original custom print. It's easy to do and takes no time at all.

You'll need the following supplies: Freezer paper or large printable labels, a copy of the image you wish to use, pencil, Xacto knife or cuticle scissors, fabric paint, paper plate, wedge sponge or small paint brush, iron, clothing you want to paint (shirts, shorts, denim, etc-I chose one of my son's plain T-shirts.), piece of thin cardboard (pizza box, T-shirt box, heavy card stock, etc)

Robot T-shirt

  1. Wash and dry the T-shirt using NO fabric softener.
  2. While your shirt's in the wash, print out the image you want on your shirt. If it is a small image, you can print directly to the printable labels and go to step 4.
  3. If using a larger image, trace it onto the freezer paper's dull side.
  4. Create the stencil by cutting out the image using either an Xacto knife or cuticle scissors from a manicure kit (I used the cuticle scissors). Remember the white parts will remain unpainted!Stencil Ironed On
  5. Iron on your stencil taking extra care to make sure all the edges and corners are stuck well to the material. (If using the printable labels, peel off the backing and stick to the material. Again, make sure the edges and corners are secure.) The paint can seep under the edges or corners if not properly secure! 
  6. Insert the thin cardboard inside the T-shirt to prevent the paint from seeping to the other side. Alternatively you can iron on a larger section of freezer paper.Painted Stencil
  7. Squirt some paint on a paper plate and using your sponge, paint the exposed parts. Follow the manufacturer's directions for drying times and washing instructions. You may need to apply more than one coat. (I had to do three coats of white paint on this blue shirt)Robot Image
  8. After the paint has dried, peel away the freezer paper and Whala, you're done! Experimenting with different paints will give you different looks. This one was done with a white velveteen paint so it gave the shirt a professional appearance.

Kitty Buttons has TONS of free stencils, by far the most I found in one place. Here's a site for the Star War's fans out there which will be my next project! If you're feeling especially creative, try incorporating different fonts or drawing your own stencil for a one of a kind item. Stencil bags, jeans, shirts, hats, anything you want to put your unique creative stamp on! Just remember you can't sell it if it's a copyrighted image but you can use it for your own personal use or give as a gift! So go ahead and get your craft on!

Saturday, January 10, 2009

Kitty Toy Ideas

Our new kitty, Sandy, has adjusted well to her new home! She's healing VERY well from her wound and is quite playful now. She loves having her belly scratched and plays with Daniel's toy letter's and blocks. I felt bad not having any toys for her and they're so very expensive in our little town. Being a frugal craft-diva, I've devised a few homemade toys for our newest family member.

Using left over jingle bells, milk jug rings, an unused key ring, and fabric remnants cut into approximately 1" wide by 18" strips, I was able to create a fun teaser toy!

  1. Tie at least three strips of fabric into a knot.
  2. Braid the strips to a desired length and tie off into a knot. Be sure to leave several inches of a fabric tail for kitty to paw at!
  3. Wind the bells and milk jug rings onto the key ring. (You can also use several soda can tabs instead the bells.)
  4. Tie the key ring onto the end of the braid, just under the knot.
  5. Enjoy watching kitty play with her new toy.

This toy can be used in a variety of ways. Tie or hang it from a hook or knob for kitty to swat, use it in tug of war, or simply let kitty drag it around the house!

Other great toy ideas: loop several soda can tabs to a key ring or tied together with fabric as a floor play toy; an empty toilet paper roll provides hours of entertainment; Styrofoam ball is tons of fun too.

Kitty Teaser Toy Teaser Toy

Tuesday, November 18, 2008

Easy Holiday Wreaths


So you're tired of last year's holiday decorations, want a new look but don't have the extra bucks in the budget? Don't think your a "crafty" person. You don't have to be stuck with last season's decor (or in my case-the last five year's worth) and you don't have to be Martha Stewart to have a beautifully festive home! Remake some of the things you already own into a new fresh piece of holiday trim in no time flat.

I've given new life to a bunch of old scented pine cones that have long since lost their pleasing aroma. Throw in some left over ribbon, an old metal coat hanger, and duct tape and I've suddenly got a beautiful holiday wreath. Follow the simple directions below to make your own custom wreath suitable for any season!

Step 1: Unwrap the head of your wire hanger. Pliers will help with this task. If it's still too difficult then snip the the head off with a heavy duty wire snipper.

Step 2: Form your wire into a circle with the ends overlapping a bit. Secure the overlapped ends with duct tape.

Step 3: Start gluing the pine cones to your metal frame. This may take quite a bit of glue to secure it firmly to the wire. Once you have several cones attached then you can add a dab of glue to the cone's contact points for added support.

Step 4: Decorate with ribbon, faux pearls, ornaments, cake toppers, flowers, light strings anything you have on hand to create a decorative flare. Recycled bows make decorating a wreath very easy. Don't forget to attach a small piece of string or picture wire to hang your wreath.

Alternatively, you can purchase a wreath from a second hand or thrift store. Remove any existing decorations and add your own! Decorating for the holidays doesn't have to break your budget or be a labor intense activity. Simply reuse what you already have for a festively inexpensive season!

If you're like me and need help tying bows, save-on-crafts provides detailed instructions on tying many different styles. There's also a ribbon rose tutorial I'm excited to use on some of my gifts this year!

What are your holiday decor plans this year?

Monday, November 10, 2008

Repurposing-The Creative Answer to Your Budget!

In our current economy crisis, it's more important than ever to find clever and creative ways to slash the budget. I'm sure you've read all about cutting the grocery, water, heating and electric bills, along with every tip known to man on how to improve your gas mileage but I've got another budget friendly tip you may not be so familiar with: Repurposing. Countless times repurposing an item has save my family the financial burden of buying a new or even used product. On occassion it's made the difference in eating well versus eating not-so-well. I can honestly say it's saved my family hundred's of dollars-yes I said HUNDREDS OF DOLLARS! Depending on how creative you are, the sky is the limit on how much money you save!

You don't know what repurposing is? It simply a type of recycling by taking an object and finding another purpose for it or a different way to use it. Repurposing helps keep our landfills free of excess materials therefore contributes to the growing "green" movement within our nation. It also saves on your garbage removal service-if it's not in the trash, you don't have to pay to haul it away!
picture of landfill Pictures, Images and Photos

Now you're wondering: How do I get started? That's simple enough! Take a look around the house, garage or the office. Just about anything can be repurposed into something else. An unused bedroom dresser can be moved to the dining room as a buffet! This works especially well for the holiday season when extra space is always necessary for the big family meal. Easily alter an old old wooden or glass french door into a coffee table or headboard with a little hardware.

Convert the over-the-door shoe rack into extra bathroom, art supply or toy storage. A wooden closet shelf, some brackets, screws, mirror, and a chair can modify a nook into a built in vanity. Mount a breadbox near the toilet for extra toilet paper storage. A decorative plant stand easily transforms to a lovely side table, bathroom or pantry storage.

Some of the most creative repurposing ideas can be found at www.junkmarketstyle.com/projects. Sue Whitney, co-author of Junk Beautiful and Decorating Junkmarket Style: Repurposed Junk to Suit Any Decor has created an online community to share, discuss, and find inspiration to turn your junk into treasure. You'll find a clever use of vintage ties: convert them into a seat cushion. A bakery style cupcake display rack metamorphoses into a terrarium. I've gleaned many inspiring ideas from her works and I'm sure you will too! Repurposing can be economical, environmentally friendly, and completely CHIC too!


Find Articles By Topic

American Express Giftcards